-
Getting Started
-
Create Mobile App
-
Mobile Application
-
Plugins Integration
-
Push Notification
-
Google Play Store
-
Apple App Store
Getting Started
Let's see introduction of LEO - Mobile App App.
-
Introduction
- LEO - Mobile App App helps you to create Android and iOS Apps for your Shopify store.
- You can increase your product's sales, your credibility and professionalism.
- You can create a professional and user-friendly App, which can differentiate your business from competitors.
- With LEO - Mobile App, You can create brands that your customers will love.
- It's also possible to increase your customer engagement activities by creating an attractive App.
-
Why This App?
- LEO - Mobile App is an App to create and launch your own iOS and Android App.
- With LEO - Mobile App, You can create any number of blocks for your App's home page.
- You will stay in touch with your App users by sending unlimited notifications. You can easily promote your products to your users.
- You can improve your user experience and engagement.
- Anytime and anywhere you can update your App's view.
- You can create an attractive App by using App's settings like title size, title position, title color, image related settings and many more.
-
Installation of LEO - Mobile App
Please follow below steps to install the App :
- Step 1 : Here you go to the "LEO - Mobile App". Go to App
-
Step 2 : Click on "Install" button and complete installation process.

After successful installation, you are ready to use this App. Now open your Shopify store's "LEO - Mobile App" App from Sales channels section. Now you can use App's features and functionalities.
-
App Starter Guide
Here are some important things you require to setup LEO - Mobile App.
- To avoid errors while using this App, make sure all products and collections need to be added in the mobile app maker Sales channel.
-
Required below details to upload your App to the Google Play Store.
- Google Play Account access. Refer Google Play Store.
- App Logo
- Feature Graphic Image, Launcher Icon, Splash Icon for Android and iOS.
- Website Url
- Privacy Policy Url etc.
-
Required below details to upload your App to the Apple App Store.
- Apple Developer Account access. Refer Apple App Store.
- App Logo
- Copyright
- Privacy Policy Url
- Support Url etc.
-
You can send unlimited scheduled notifications to your app users who downloaded the "LEO - Mobile App" App. The following firebase details are required to send notifications.
- Firebase Admin SDK File

Create Mobile app
Help from LEO App team.
-
How to design home page for App?
It's very simple and easy to create your mobile App's home page.
App Header
Your App's Header is divided into 3 parts, are as under:
- Menu icon, which is use to open sidebar menus
- Application logo or Application name
- Cart icon, which is use to open the cart page

App Home Page
- It is very important for all Apps to have an attractive home page.
- The middle section shows what your mobile app will look like.
- You can add any number of blocks for your App's home page.
- Easy to rearrange the home page blocks.
"LEO - Mobile App", provide facility to create Middle section by adding the following blocks.
- Search Block
- Portfolio Slider Block
- Header Block
- Customer Testimonials Block
- Banner Slider Block
- Featured Brands Block
- Collections Carousel Block
- Products Block
- Collections Block
- Collections Slider Block
- Featured Products Block
- Banner Block
- Horizontal Separator (Line)
- Timer Block
Each blocks contains different settings for blocks like Title font size, Font color, Block background color, Image overlay, Image border, Block view(Square or Circle), Product/Collection view(Ascending or descending) and many more.
-
How to customize the App's sidebar?
Please follow below steps to customize your side menu in Admin panel:
- Step 1 : Open "LEO - Mobile App" Sales channel from the Shopify store's admin.
- Step 2 : Open App's Customize menu.
- Step 3 : Go to the Menu tab which you can see on top of Customize page.
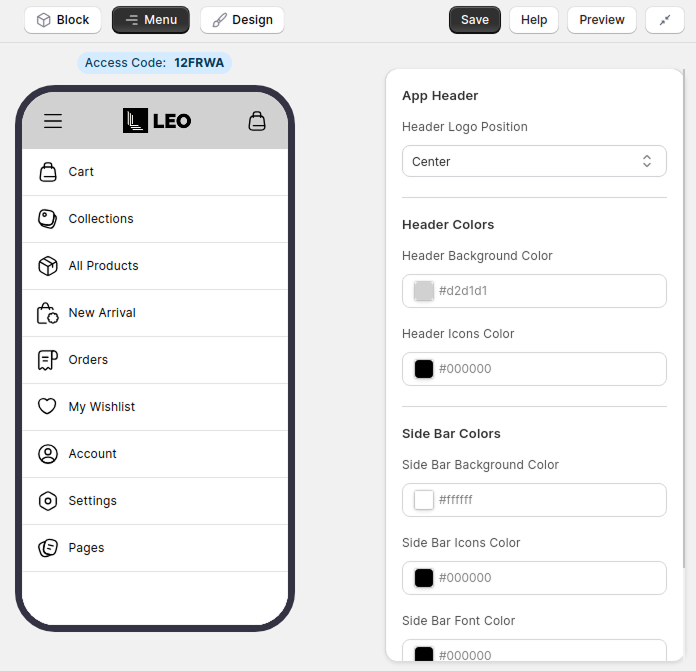
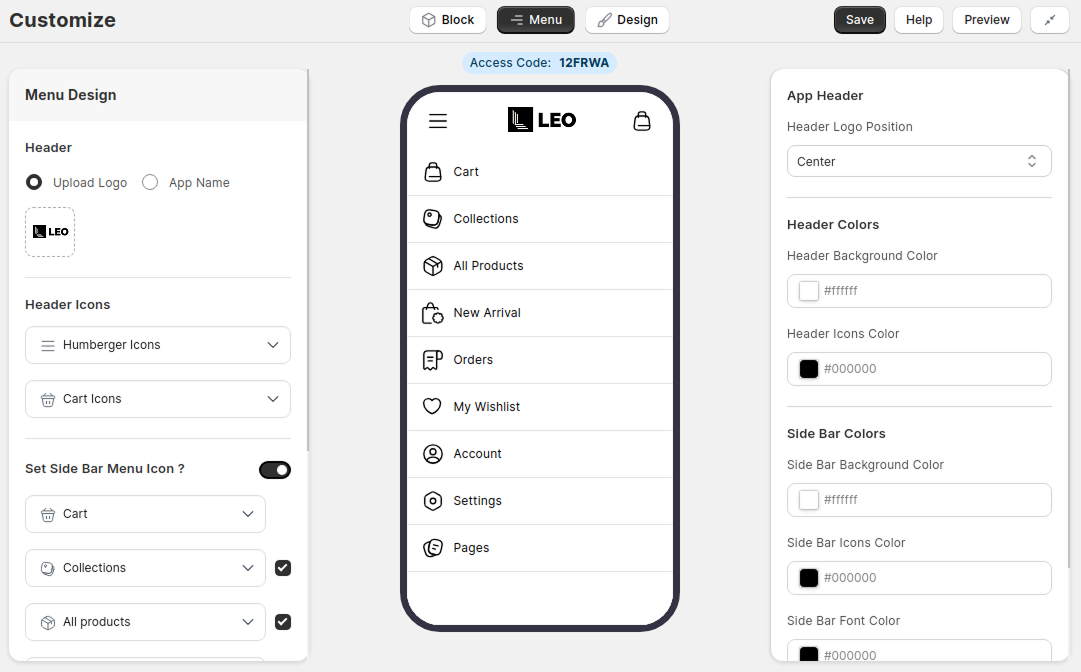
App's Menu Settings
Following Menu settings provided to you :
- Set Header Logo or App Name
- Change Header Icons
- Enable/Disable Side Bar Menu Icons
- Change View of Side Bar Menu Icons
- Make Visible/Hide Side Bar Menus
- Rearrange Menu Position by drag & drop
- Header Logo Position
- Header Background Color
- Header Icons Color
- Side Bar Background Color
- Side Bar Icons Color
- Side Bar Font Color
- Enable/Disable Side Bar Underline
- Side Bar Underline Color
Admin Sidebar List Preview

App's Header Color
Please follow below steps to change App's header color in Admin panel:
- Step 1 : Open "LEO - Mobile App" Sales channel from the Shopify store's admin.
- Step 2 : Open App's Customize menu.
- Step 3 : Go to the Menu tab which you can see on top of Customize page.
- Step 4 : On your right side, you can see "Header Background Color". Set your App's Header color from there.
App's Button Color
Please follow below steps to change App's button color in Admin panel:
- Step 1 : Open "LEO - Mobile App" Sales channel from the Shopify store's admin.
- Step 2 : Open App's Customize menu.
- Step 3 : Go to the Design tab which you can see on top of Customize page.
- Step 4 : On your right side, you can see "Primary Button Colors". Set your App's Button color from there.
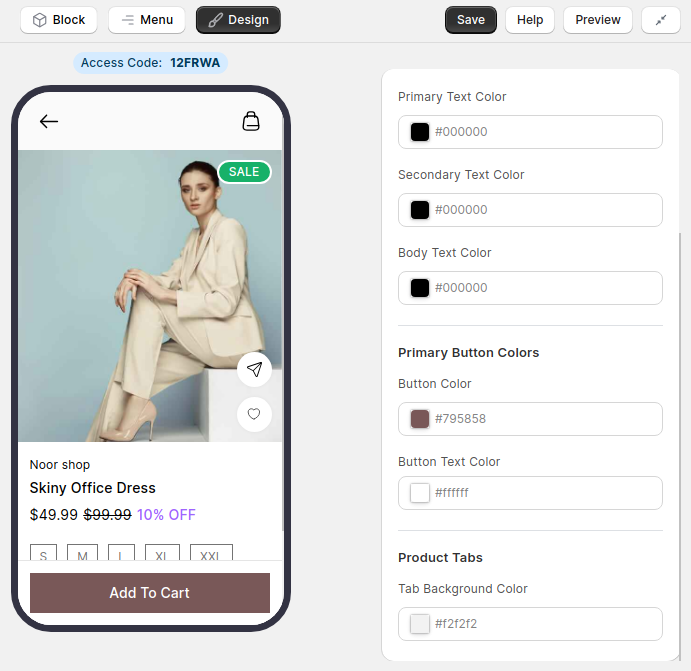
Note: The "Primary Button Colors" will be used in the buttons used throughout the mobile App. Such as the button on the overlay of the Collection Carousel block.
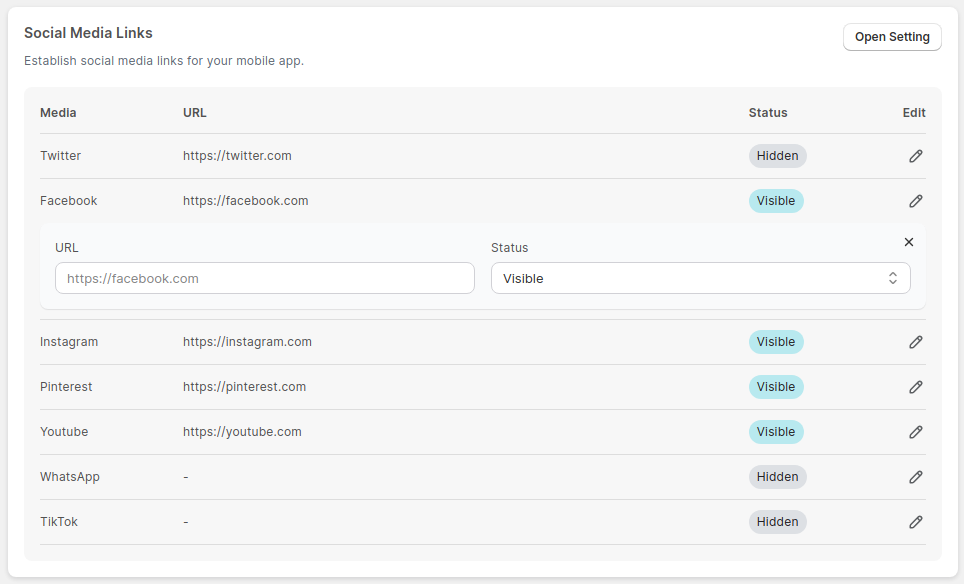
App's Social Media Links
App's Social media will be shown at the bottom of the sidebar in your mobile App as a Social media icon.
Please follow below steps to set Social Media Links to your App :
- Step 1 : Open "LEO - Mobile App" Sales channel from the Shopify store's admin.
- Step 2 : Go to Settings -> General Settings -> Social Media Links.
- Step 3 : Now set Url for "Social Media" and set Status(Visible/Hidden) for it.
Admin Social Media Preview
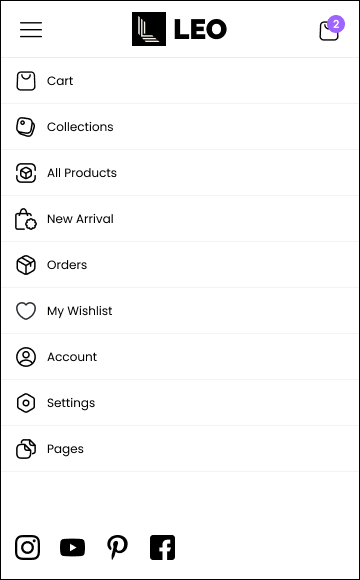
Mobile App Sidebar Preview
-
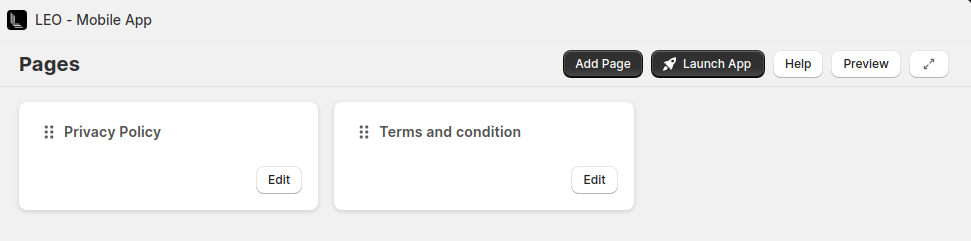
How to create App's pages?
It is easy to setup App's pages. Easy to Add, Edit and Delete the content of the App's pages.
To rearrange the pages, just drag and drop it.
You can add content text or redirect external link for App's pages.
Please follow below steps to create pages of the App :
- Step 1 : Open "LEO - Mobile App" Sales channel from the Shopify store's admin.
- Step 2 : Open App's Pages menu.
- Step 3 : Click on "Add Page" button to add a new page.
- Step 4 : Add page data then click on the "Save" button.
- Step 5 : On successful creation of page, You will get a success message.
Admin Pages Preview

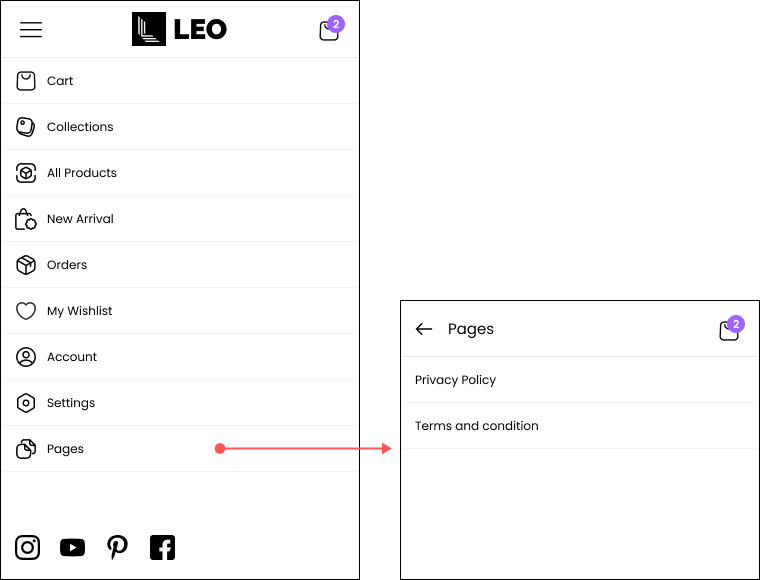
Note: There are two mandatory pages: 1. "Privacy Policy" and 2. "Terms and Conditions". You can just edit these pages, can't delete these pages.
Please follow below steps to view your App's pages in mobile App:
- Step 1 : Open App on your device.
- Step 2 : Click on the Sidebar icon in the header.
- Step 3 : Find Pages menu and click on them to get a list of App's pages.
Mobile App Preview
-
How to view product tag in product listing for your mobile app?
You can highlight your product from other products by adding tag for product.
Your product tag must be start with prefix "IMP_".
Ex. IMP_Classic, IMP_Most Loved etc.
Note: You can display only one tag for your product in product list. If you add more than one tag which starts with "IMP_" then you can see only first tag in your mobile app's product list.
Mobile App Product List Preview
Please follow below steps to view product listing in your mobile App:
- Step 1: Open the App on your device.
- Step 2 : Click on the Sidebar icon in the header.
- Step 3 : Go to the "All Products" menu.
- Step 4 : You can see added tag at top left side in product listing.

-
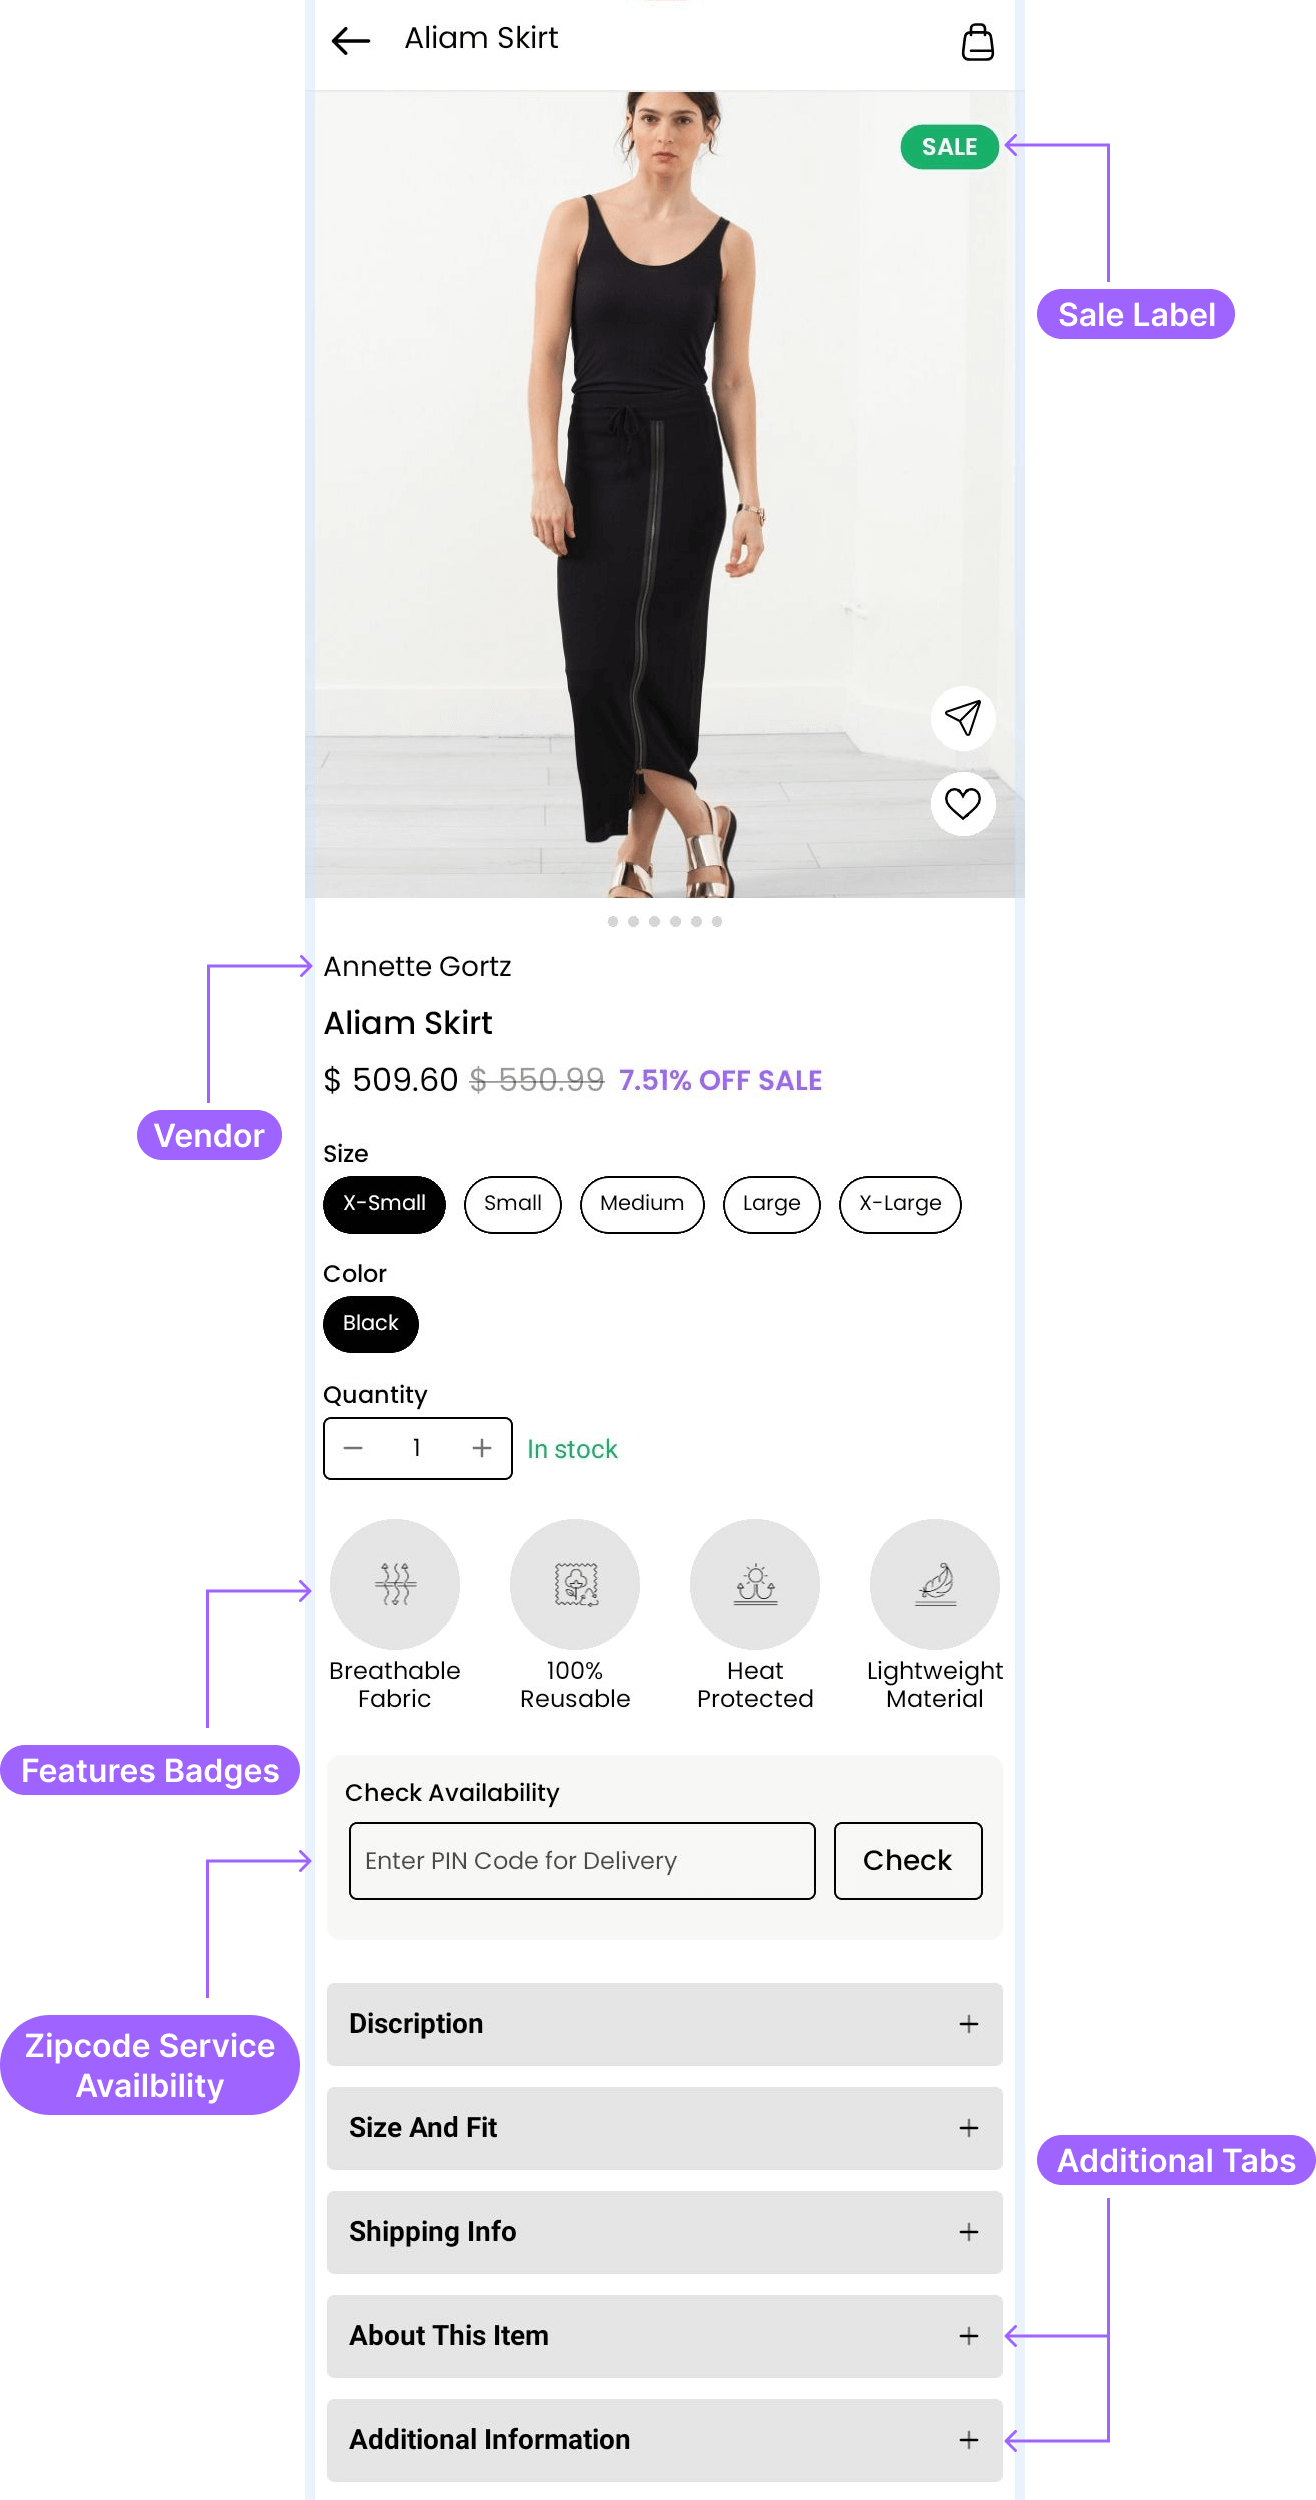
How to setup App's product page?
The product page describes product details such as Product name, Price, Comparison price, Variants, Status (out of stock or in stock), Sale tag, Seller name etc.
Display Product's Vendor And Sale Label
Please follow below steps to setup your App's product page:
- Step 1 : Open "LEO - Mobile App" Sales channel from the Shopify store's admin.
-
Step 2 : Go to Settings -> Product Settings -> Product Page Settings.
It display settings for products like :
- Vendor Name
- Sale Label
Admin Product Page Settings Preview

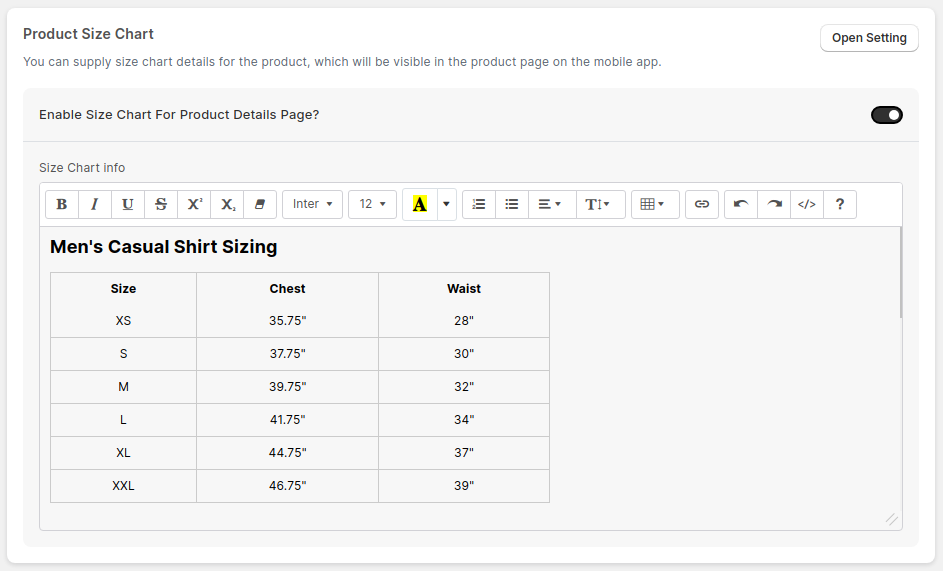
Product Size Chart
Please follow below steps to set size chart for product:
- Step 1 : Open "LEO - Mobile App" Sales channel from the Shopify store's admin.
- Step 2 : Go to Settings -> Product Settings -> Product Size Chart.
- Step 3 : Enable size chart setting and set size chart content for products.
Note: Product size chart will be same for each products for your mobile app.
Admin Size Chart Setting Preview
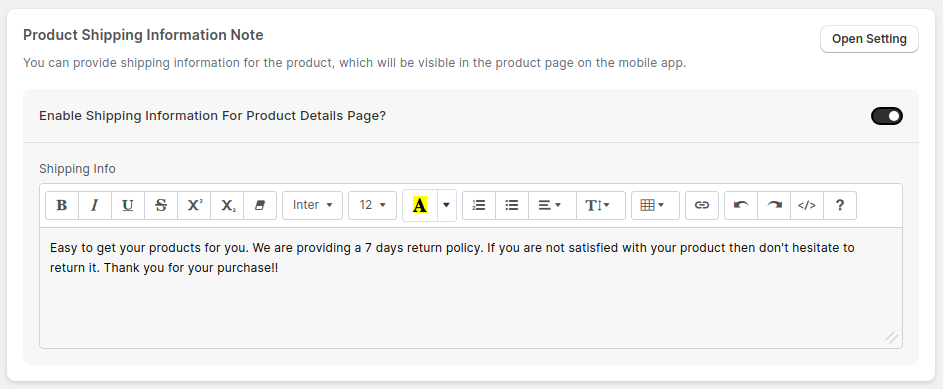
Shipping Information Note
Please follow below steps to set shipping information for product:
- Step 1 : Open "LEO - Mobile App" Sales channel from the Shopify store's admin.
- Step 2 : Go to Settings -> Product Settings -> Shipping Information Note.
- Step 3 : Enable shipping information setting and set shipping content for products.
Note: Product shipping information will be same for each products for your mobile app.
Admin Shipping Information Setting Preview
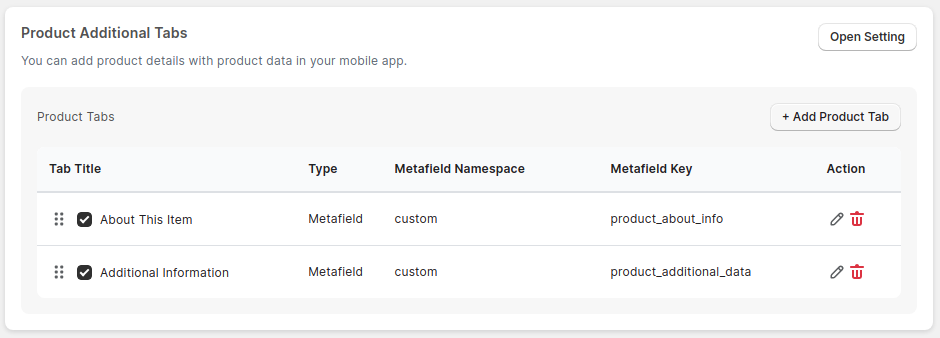
Product Additional Tabs
Please follow below steps to add additional information for product:
- Step 1 : Open "LEO - Mobile App" Sales channel from the Shopify store's admin.
- Step 2 : Go to Settings -> Product Settings -> Product Additional Tabs -> Add Product Tab.
-
Step 3 : You will get popup for details. Add all required details in it.
There are two types of products tabs you can add, are as under:
- Fixed: This tabs are same for each products in your mobile app. In product detail page, you can see this product tabs.
- Based On Metafield: This product tabs are display for those products which Shopify product metafield matched with your inputed metafield.
Note: For Based On Metafield option, you have to create Product Metafield in your Shopify store. After that add metafield namespace and key in tab settings popup at admin panel. If both metafield's namespace and key are matched, then only you will get this product tab with product detail.
- Step 4 : After adding all data, click on "Add" button.
- Step 5 : Save your settings by clicking on "Save" button from top bar.
Note: You can rearrange this tabs view position by drag and drop the tab as per your requirements.
Admin Product Additional Tabs Setting Preview
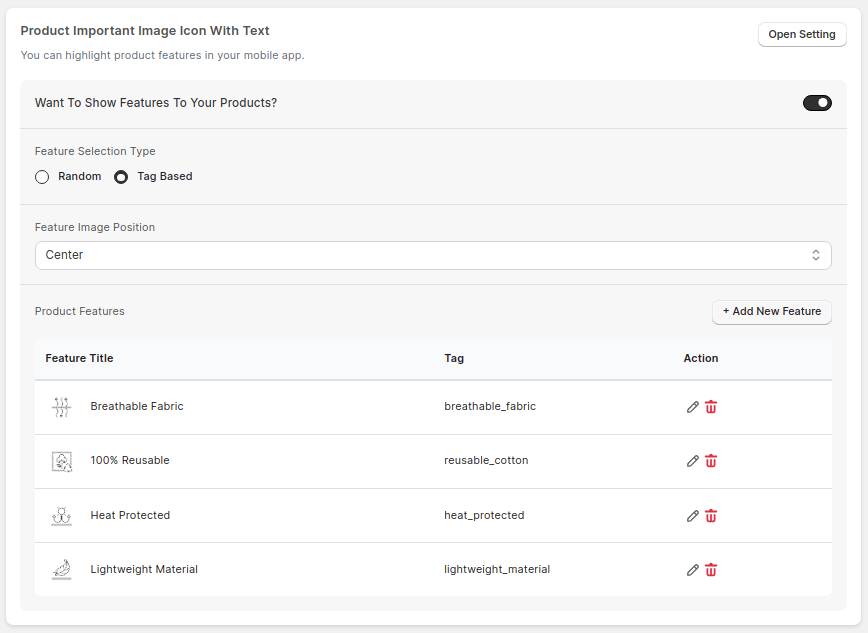
Product Important Image Icon With Text
Please follow below steps to display product important data with image for product:
- Step 1 : Open "LEO - Mobile App" Sales channel from the Shopify store's admin.
- Step 2 : Go to Settings -> Product Settings -> Product Important Image Icon With Text.
- Step 3 : Enable features switch if you want to show features with your product details.
-
Step 4 : Select features selection type.
There are two selection types, are as under:
- Random: It display randomly any 4 features with your product detail.
- Tag Based: It display tag based features with your product detail.
Note: For Tag Based option, you have to add tag in your shopify product. And also add this same tag in "Tag Name" field of features details at admin panel. If both tags are matched, then only you will get features badges with product detail.
- Step 5 : Save your settings by clicking on "Save" button from top bar.
Admin Product Important Image Icon With Text Setting Preview

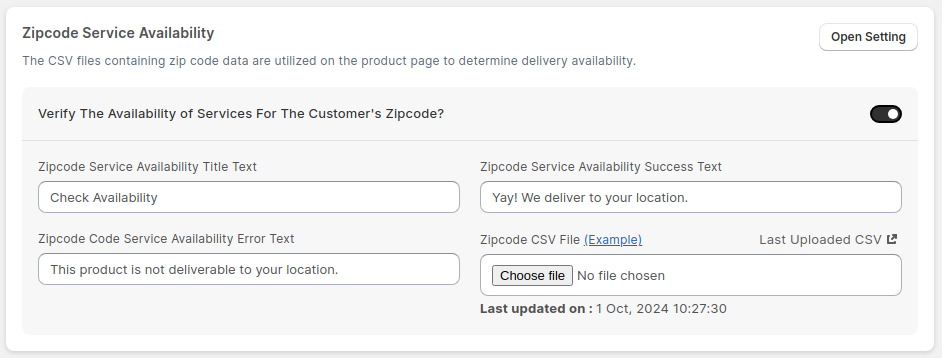
Zipcode Service Availability
Please follow below steps to add zipcode service availability checker for product:
- Step 1 : Open "LEO - Mobile App" Sales channel from the Shopify store's admin.
- Step 2 : Go to Settings -> Product Settings -> Zipcode Service Availbility.
- Step 3 : Enable "Verify The Availability of Services For The Customer's Zipcode?" to add service availbility checker in mobile App.
- Step 4 : Add Zipcode settings like Title Text, Success Text, Error Text and Zipcode CSV File(service providing area's zipcode) etc.
- Step 5 : Save your settings by clicking on "Save" button from top bar.
Admin Zipcode Service Availbility Setting Preview

Mobile App Product Page Preview
Please follow below steps to view product page of your App:
- Step 1: Open the App on your device.
- Step 2 : Click on any Product from the Product list in your App.
-
-
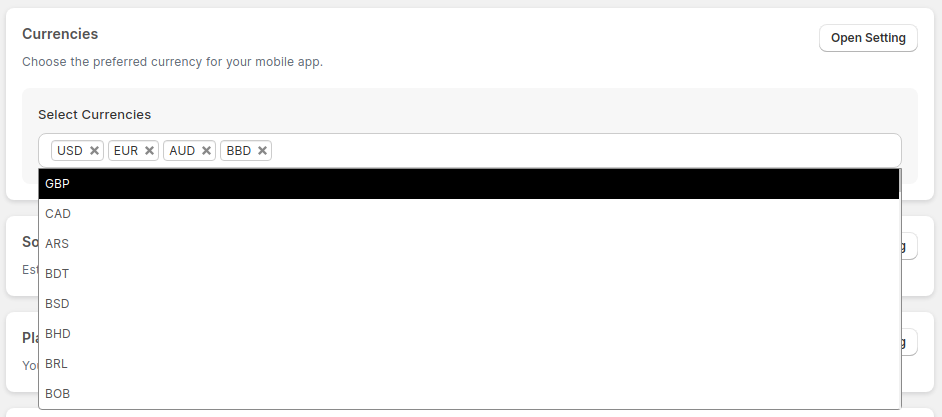
How to setup App's currency?
It's very easy to set multiple currency for your mobile App.
Please follow below steps to set multi currency in Admin panel:
- Step 1 : Open "LEO - Mobile App" Sales channel from the Shopify store's admin.
- Step 2 : Go to Settings -> General Settings -> Currencies.
-
Step 3 : Select currencies which you want for your mobile App.
-
Step 4 : Save your settings by clicking on "Save" button from topbar.
Admin Currencies Settings Preview
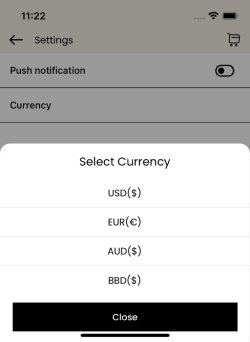
Mobile App Currencies View
Please follow below steps to view multi currency in your mobile App:
- Step 1 : Open the App in your device.
- Step 2 : Click on the Sidebar icon in the header.
- Step 3 : Go to the "Settings" menu.
- Step 4 : Click on the "Currency" to view your App's currencies.
Mobile App Preview
-
App Analytics
You can easily do analysis about you App's data. You can apply filter to do analytics as per your requirements.
Please follow below steps to view App's analytics data:
- Step 1 : Open "LEO - Mobile App" Sales channel from the Shopify store's admin.
- Step 2 : Here, you can see your App's data.
You will see the following data for your app's analytics:
- Total Sales - Total amount which are generated by orders from your mobile App.
- Total Orders - Total number of orders which are generated from your mobile App.
- Total Add To Cart - Total amount of the product which are added to the cart.
- App Users - The sum of users who installed your App in Android and IOS devices.
- Most Viewed Products - Frequently viewed product in your App.
- Most Viewed Collections - Frequently viewed collection in your App.


Mobile Application
Help from LEO App team.
-
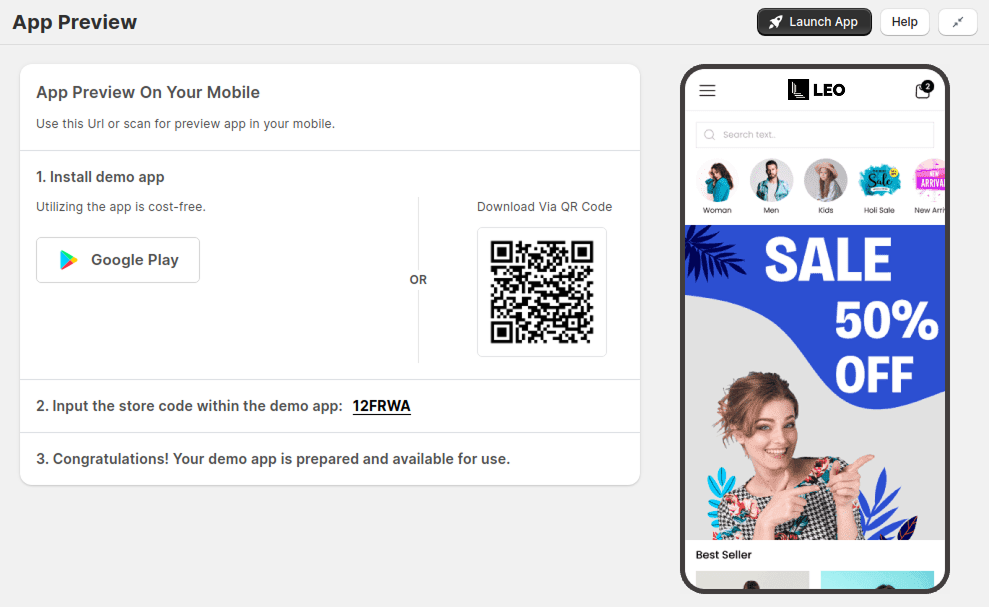
How do I see a preview of my mobile App?
Please follow below steps to view your App's preview code:
- Step 1 : Open "LEO - Mobile App" Sales channel from the Shopify store's admin.
- Step 2 : Open App's App Preview menu.
- Step 3 : You will find Store code, use it to view your demo App.

-
How to login and register into the mobile App?
Login into mobile App:
Please follow below steps to login into mobile App:
- Step 1 : Open the App on your device.
- Step 2 : Click on the Sidebar icon in the header.
- Step 3 : Go to the "Account" menu.
- Step 4 : You will see Login Page. Add your login credentials(Email Address, Password).
- Step 5 : Click on the "Sign in" button to do login inside App.

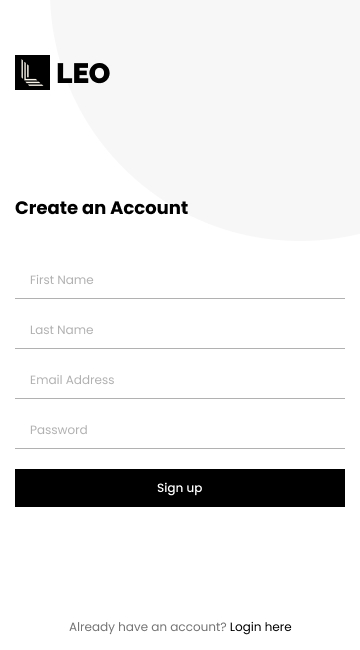
Register/Create Account into mobile App:
Please follow below steps to create account into mobile App:
- Step 1 : Open the App on your device.
- Step 2 : Click on the Sidebar icon in the header.
- Step 3 : Go to the "Account" menu.
- Step 4 : You will see "Don't have an account? Register here" link on bottom of the App, click on it.
- Step 5 : Add your details and click on the "Sign up" button.
-
How to add and view products into wishlist in mobile App?
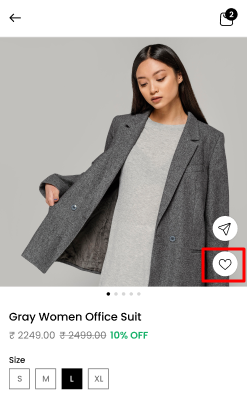
Add products into wishlist in mobile App:
Please follow below steps to add products into wishlist:
- Step 1 : Open the App on your device.
- Step 2 : Click on any Product which is listed in home page.
- Step 3 : You will get Heart icon in product details.
- Step 4 : Click on Heart icon to add product into wishlist.
- Step 5 : Now you can see your product into wishlist list.
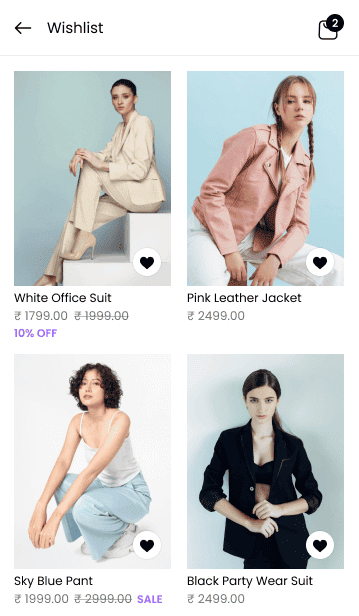
View wishlist into mobile App:
Please follow below steps to see wishlist products into mobile App:
- Step 1 : Open the App on your device.
- Step 2 : Click on the Sidebar icon in the header.
- Step 3 : Go to the "My wishlist" menu.
- Step 4 : You will see all products list which you added into your wishlist.
-
How to add products into cart and view cart products in mobile App?
Add products into cart in mobile App:
Please follow below steps to add products into cart:
- Step 1 : Open the App on your device.
- Step 2 : Click on any Product which is listed in home page.
- Step 3 : Click on "Add to cart" button to add product into cart.
- Step 4 : Now you can see your product into cart list.
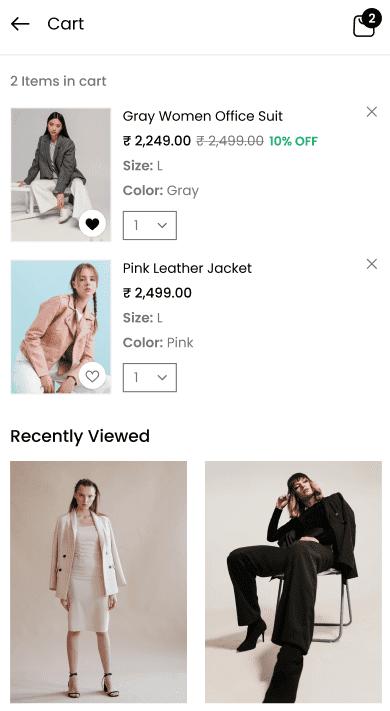
View cart products into mobile App:
Please follow below steps to see cart products into mobile App:
- Step 1 : Open the App on your device.
- Step 2 : Click on the Sidebar icon in the header.
- Step 3 : Go to the "Cart" menu.
- Step 4 : You will see all products list which you added into cart.
-
Mobile App Exclusive Discount
Discount is a great way to encourage your App users to buy a product.
By this way, Product vendors increase their purchases.
It is easily to do setup for product discount for your mobile App.
Create Discount into Shopify store:
Please follow below steps to create discount into Shopify store:
- Step 1 : Open your Shopify store.
- Step 2 : Click on the Discounts menu from sidebar.
- Step 3 : Click on the Create discount button to create new discout.
- Step 4 : Then Select discount type which you want.
- Step 5 : Add discount details and click on the Save button.
- Step 6 : You get new created discount in Discounts list in yor Shopify store.

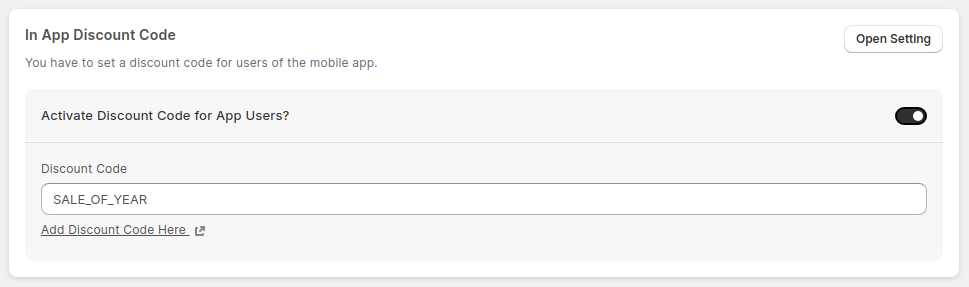
Add discount for your mobile App:
Please follow below steps to add discount for your mobile App:
- Step 1 : Open "LEO - Mobile App" Sales channel from the Shopify store's admin.
- Step 2 : Go to Settings -> General Settings -> In App Discount Code.
- Step 3 : Then Enable "Activate Discount Code for App Users?", if you want to give discount to your App users.
- Step 4 : Add Discount Code which you created in your Shopify store.
- Step 5 : Save your settings by clicking on "Save" button from top bar.


Plugins Integration
Help from LEO App team.
-
Product Review
It is easily to do setup product review plugin with your mobile App.
Review Apps:
- Judge Me
-
Judge Me
Please follow below steps to integrate Judge Me plugin with your mobile App:
- Step 1 : Open your Shopify store.
- Step 2 : Install Judge.me Reviews App in your shopify store.
- Step 3 : Set required settings for this app.
- Step 4 : Open "LEO - Mobile App" Sales channel from the Shopify store's admin.
- Step 5 : Go to Settings -> Plugins Settings ->Plugins -> Review.
- Step 6 : Enable "Review" plugin, if you want to integrate product review plugin with your mobile App.
-
Step 7 : Select "Judge Me" option and add "Judge Me Private Token" to integrate this plugin.
To Get Judge Me Private Token: Click Here
- Step 8 : Save your settings by clicking on "Save" button from top bar.

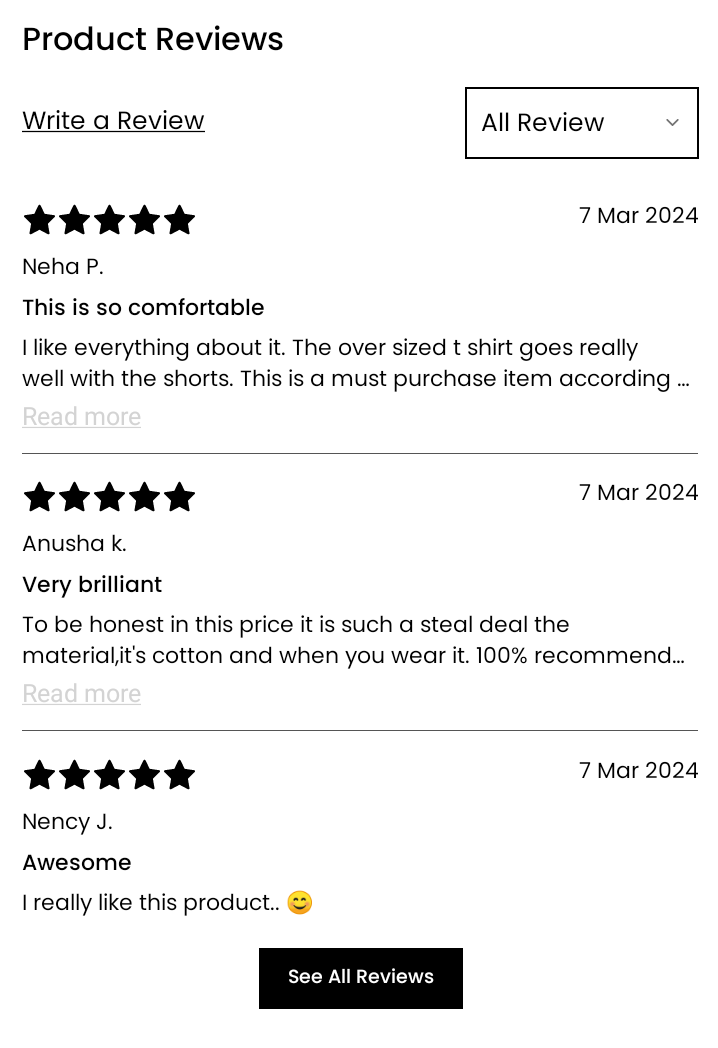
Mobile App Preview
You can see reviews in your product detail page.

-
Newsletter
Note:
This plugin integration available for "Paid" users.
Newsletter Apps:
- Klaviyo
- Mailchimp
-
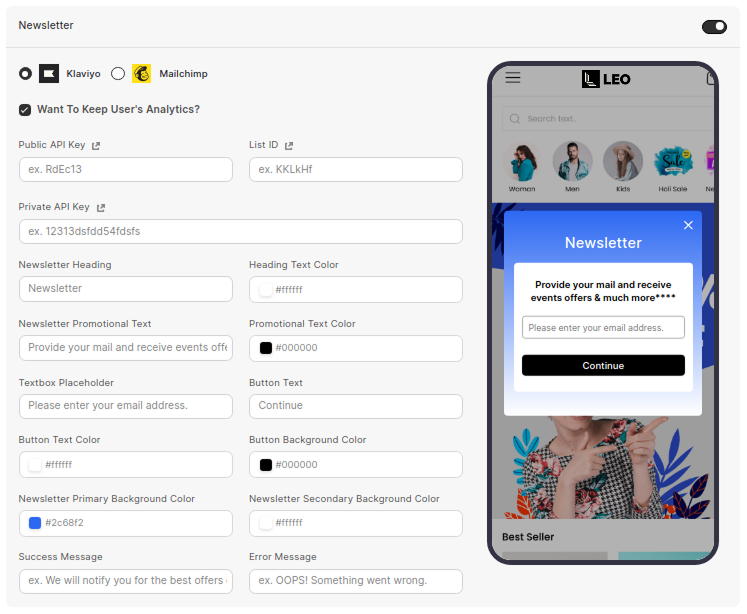
Klaviyo
Please follow below steps to integrate Klaviyo plugin with your mobile App:
- Step 1 : Open your Shopify store.
- Step 2 : Install Klaviyo: Email Marketing & SMS App in your shopify store.
- Step 3 : Complete setup for this app.
- Step 4 : Open "LEO - Mobile App" Sales channel from the Shopify store's admin.
- Step 5 : Go to Settings -> Plugins Settings -> Plugins -> Newsletter.
- Step 6 : Enable "Newsletter" plugin, if you want to integrate newsletter plugin with your mobile App.
-
Step 7 : Select "Klaviyo" option and add below details to integrate this plugin.
- Want To Keep User's Analytics?
- Public API Key (How to get?)
- List ID (How to get?)
- Private API Key (How to get?)
- Newsletter Heading
- Heading Text Color
- Newsletter Promotional Text
- Promotional Text Color
- Textbox Placeholder
- Button Text
- Button Text Color
- Button Background Color
- Newsletter Primary Background Color
- Newsletter Secondary Background Color
- Success Message
- Error Message
- Step 8 : Save your settings by clicking on "Save" button from top bar.
-
Mailchimp
Please follow below steps to integrate Mailchimp plugin with your mobile App:
- Step 1 : Open your Shopify store.
- Step 2 : Install Mailchimp: Email & SMS App in your shopify store.
- Step 3 : Complete setup for this app.
- Step 4 : Open "LEO - Mobile App" Sales channel from the Shopify store's admin.
- Step 5 : Go to Settings -> Plugins Settings -> Plugins -> Newsletter.
- Step 6 : Enable "Newsletter" plugin, if you want to integrate newsletter plugin with your mobile App.
-
Step 7 : Select "Mailchimp" option and add below details to integrate this plugin.
- Want To Keep User's Analytics?
- API Key (How to get?)
- Audience ID (How to get?)
- Newsletter Heading
- Heading Text Color
- Newsletter Promotional Text
- Promotional Text Color
- Textbox Placeholder
- Button Text
- Button Text Color
- Button Background Color
- Newsletter Primary Background Color
- Newsletter Secondary Background Color
- Success Message
- Error Message
- Step 8 : Save your settings by clicking on "Save" button from top bar.
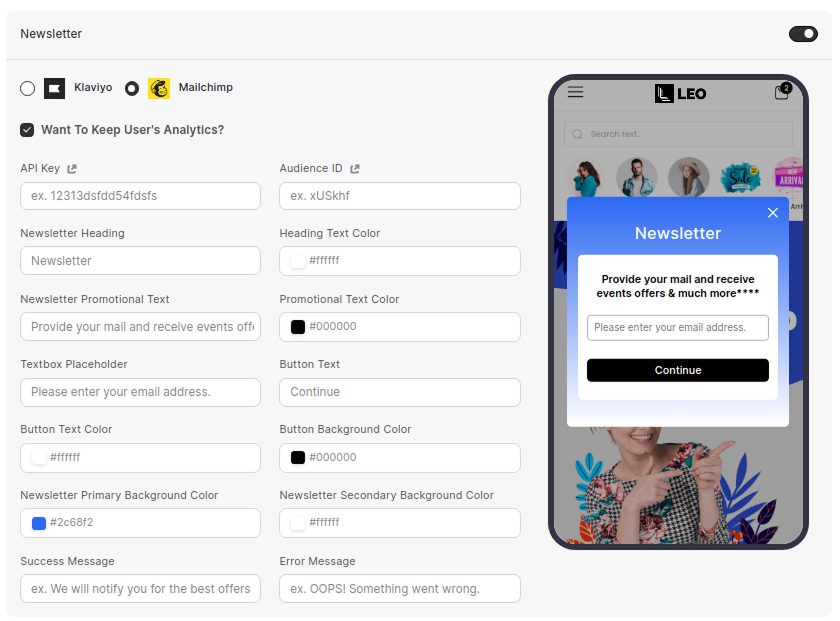
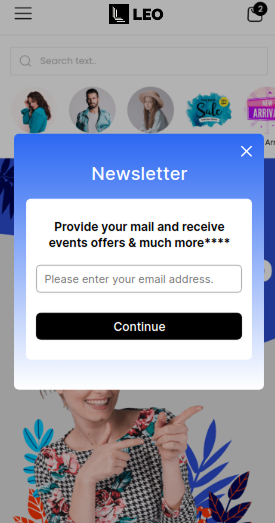
Mobile App Preview
You can see newsletter popup while open your mobile app.
-
Product Subscription
Note:
This plugin integration available for "Paid" users.
Product Subscription Apps:
- Seal Subscription
-
Seal Subscription
Please follow below steps to integrate Seal Subscription plugin with your mobile App:
- Step 1 : Open your Shopify store.
- Step 2 : Install Seal Subscriptions App in your shopify store.
- Step 3 : Complete setup for this app.
- Step 4 : Open "LEO - Mobile App" Sales channel from the Shopify store's admin.
- Step 5 : Go to Settings -> Plugins Settings -> Plugins -> Product Subscription.
- Step 6 : Enable "Product Subscription" plugin, if you want to integrate product subscription plugin with your mobile App.
-
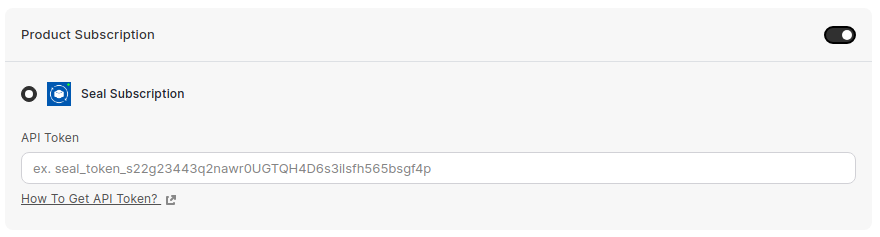
Step 7 : Select "Seal Subscription" option and add "API Token" to integrate this plugin.
To Get API Token: Click Here
- Step 8 : Save your settings by clicking on "Save" button from top bar.
Mobile App Preview
You can see subscription options in your product detail page.


Push Notification
Help from LEO App team.
-
How to invite our team as an admin to your firebase project?
It's necessary to create a separate Firebase account and project to send notifications to your iOS and Android users.
Please follow below steps to do setup for firebase account to send notification:
-
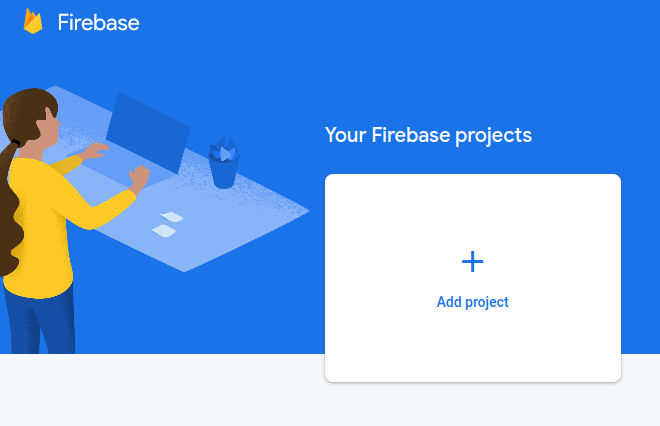
Step 1 : Go to the https://console.firebase.google.com/
-
Step 2 : Create a new project with your existing Google Account or sign in with an existing project.
-
Step 3 : Here is the process for creating a new project.
-
Click on the Create a project button.
-
Enter Project Name(Your store name or App name), accept the Firebase terms and condition, and click on the Continue button.

-
Click on the Continue button.

-
Then Choose or create a Google Analytics account and click on the Continue button.
-
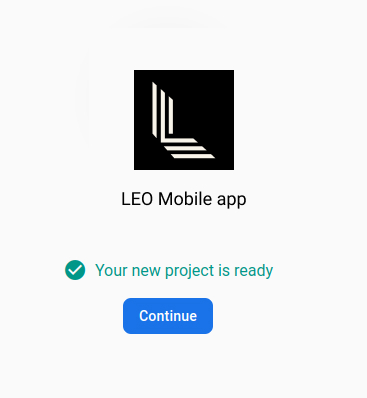
Wait for the project to be created and then click on the Continue button.
-
How to invite our team as an admin to your account?
-
Step 1 : Click the Settings
 icon, then select Users and permission.
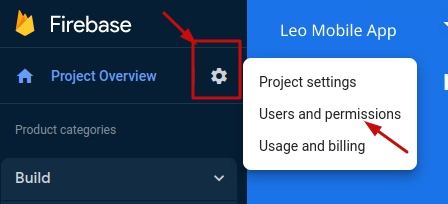
-
Step 2 :Then on the Users and permissions page, click on the Add member button.

-
Step 3 : Add our [email protected] email address. Make sure to use the email provided by our team and select the "Owner" role so we have access to everything we need to ensure that your app works correctly and that all features are working as expected.
-
Step 4 : Then click on the Done button and then click on the Add member button and the invitation will be sent.

-
Step 5 : Our team will receive an invitation to manage your Firebase project.
-
-
Why do we use Firebase to send Notification?
Firebase is commonly used for sending notifications in mobile applications due to its robust and easy-to-use Cloud Messaging service.
Firebase Cloud Messaging (FCM) provides a reliable connection between your server and devices that allows you to deliver and receive notifications on iOS and Android devices.
-
How to send broadcast notification to App users?
You can send unlimited notifications to your App users.
You can send notification separately in Android and iOS device users of your App.
Please follow below steps to send notification to your App users:
- Step 1 : Open "LEO - Mobile App" Sales channel from the Shopify store's admin.
- Step 2 : Click on the Notifications menu.
- Step 3 : Select Notification Timezone and Notification Date Time, On that time automatic notification will send to your users. Also add required notification details which you want to send with notification.
- Step 4 : Then click on the "Save" button from top of the page.
- Step 5 : You can view notification history by clicking on "View History" button.

-
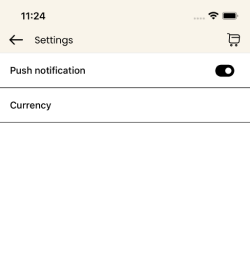
How to receive notifications in your mobile App?
To receive App's notification, you need to enable "Push Notification" from your mobile App.
Please follow below steps to enable push notification in your mobile App:
- Step 1 : Open the App on your device.
- Step 2 : Click on the Sidebar icon in the header.
- Step 3 : Go to the "Settings" menu.
- Step 4 : Enable "Push notification" to get notifications from App.

Google Play Store
Help from LEO App team.
-
How to create Google Play Store account?
A Google Play Developer account for your company is essential to publish the app.
You are required to pay a 25 USD (One time) fee for creating a Google Play Store account.
For Create Google Play Console Account:
- Find a comprehensive guide on creating a Google Play Console account at:
https://support.google.com/googleplay/android-developer/answer/6112435For your Google Play Console Account Access:
- To submit your app and access your Google Play Console account, add us as a developer using the email [email protected].
Below is step by step video guide for how to add:
Note:
Upon receiving your invitation, we will submit the app to the Google Play Store within 48 hours.
The approval process typically takes around 2 to 4 business days.
We will promptly notify you once your app is published on the Play Store.
-
Where can I set up Google Play Store details?
Please follow below steps to setup Google play store details in admin:
- Step 1 : Open "LEO - Mobile App" Sales channel from the Shopify store's admin.
- Step 2 : Click on the Google Store menu.
- Step 3 : Add Google Store Details and Google Store Images.
- Step 4 : Then click on the "Save" button from top of the page.
- Step 5 : You will get success message for successfully saved your data.
Admin Google Store Preview


Apple App Store
Help from LEO App team.
-
How to create Apple App Store account?
An Apple Developer account for your company is essential to publish the app.
You are required to pay a 99 USD (Yearly) fee for creating an Apple Developer account.
For Create Apple Developer Account:
- Find a comprehensive guide on creating a Apple Developer account at:
https://developer.apple.com/enroll/Kindly proceed with the following steps for an Individual Account:
-
Step 1 : Log in to App Store Connect.
-
Step 2 : Select "Users and Access".
-
Step 3 : In the "Users and Access" section, select the "+" sign under iTunes Connect users.
-
Step 4 : Input the details as indicated below into the dialog box on your screen.
First Name: LEO - Mobile App
Last Name: Team
Email ID: [email protected]
Ensure that you choose the role of Admin.
-
Step 5 : Press the "Invite" button.
Kindly proceed with the following steps for an Organization Account:
-
Step 1 : Visit the Apple Store and log in using your Apple Developer Account.
-
Step 2 : In the Overview section, select People.
-
Step 3 : When you reach the People section, click on "Go to App Store Connect".
-
Step 4 : In the Users and Access section, select the "+" button.
-
Step 5 : Input the details as specified below into the dialog box on your screen.
First Name: LEO - Mobile App
Last Name: Team
Email ID: [email protected]
Ensure that you choose the role of Admin.
-
Step 6 : Press the "Invite" button.
Note:
Upon completion of the Apple Developer Account setup, we will submit the app to the Apple App Store within 48 hours.
The approval process typically takes around 3 to 7 business days.
We will promptly notify you once your app is published on the Apple Store.
-
-
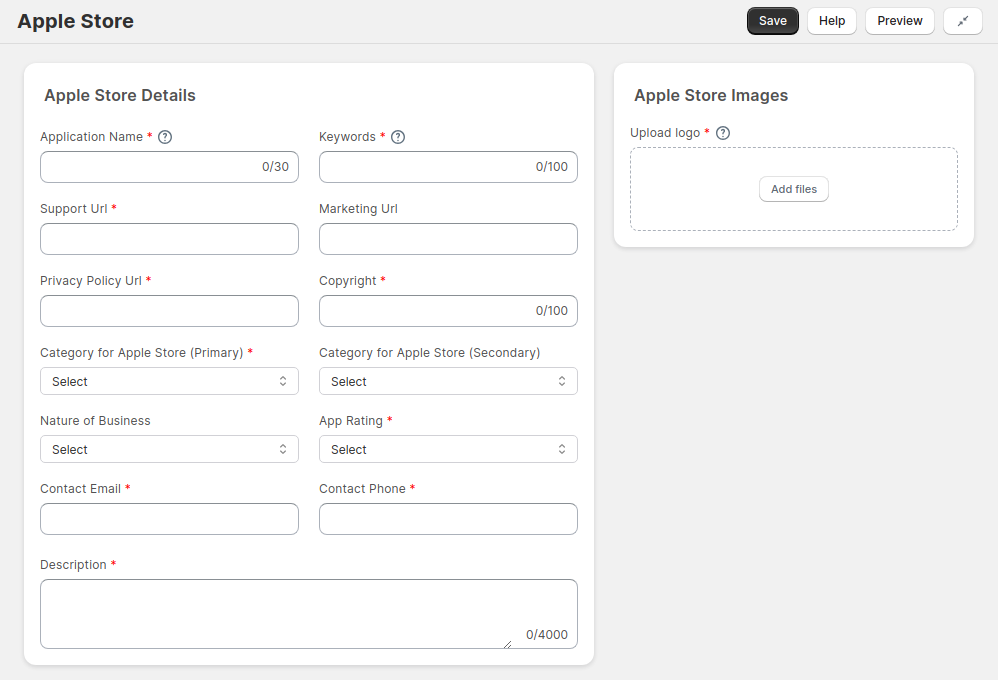
Where do you set up Apple App Store details?
Please follow below steps to set up App store details in admin:
- Step 1 : Open "LEO - Mobile App" Sales channel from the Shopify store's admin.
- Step 2 : Click on the Apple Store menu.
- Step 3 : Add Apple Store Details and Apple Store Images.
- Step 4 : Then click on the "Save" button from topbar.
- Step 5 : You will get success message for successfully saved your data.
Admin Apple Store Preview